A warm hat for a newborn baby is knitted quickly and quite simply. Using the description of knitting, even a beginner knitter can “master” a hat. When knitting, it is very important to choose the right yarn. It is better to use natural cotton threads, and for a warm cap - woolen threads. Merino wool is very suitable - it makes soft, scratch-free children's caps. Before you start knitting, you need to determine the required number of loops. To do this, you need to knit a sample from the selected yarn and count how many loops and rows there are in 1 cm of knitted fabric.
Read about how to calculate the number of loops on a hat in this article .
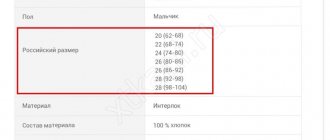
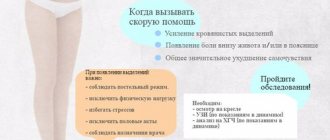
Approximate table of children's sizes:
For everyday wear for a newborn, it is better to choose caps of a simple style, with a minimum of bows, frills, ruffles, etc. These decorations can disturb the baby. Hats with ears are more suitable for winter.
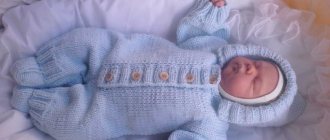
Comfortable hat for a newborn
This model can be knitted for both summer and winter, it all depends on the yarn you choose. If the knitted hat for a newborn is summer or spring, then for work it is better to take thin cotton yarn, if it is autumn or winter, then wool or wool blend.
Knitting for babies should be made from special hypoallergenic yarn. This is usually high-quality acrylic, wool with acrylic added, or soft cotton.
To work on such a hat you will need yarn of two or three colors. If the hat is intended for a boy, then you can take white, light gray and blue yarn; for a girl, white, pink, and yellow are suitable.
- For a head volume of 35 cm, cast on 65-70 stitches on the knitting needles.
- Knit the first eight rows with a 2x2 rib (yarn of the same color).
- Switch to a different color yarn and work in stockinette stitch.
- After six rows, change the color, but continue knitting in stockinette stitch.
- Having knitted a total of 18 rows, proceed to decreases (remember to alternate colors).
- Divide the number of all loops into 7 parts.
- On each even row, knit two stitches together every seven stitches.
- When there are seven stitches left on the left needle, knit them all together. Make a knot and hide the thread.
- Make a neat little seam. A simple knitted hat for a newborn is ready!
This model is very convenient for the baby and quick to implement. The design of the cap is up to you.
Winter hat with ears for a newborn with description and diagrams
The calculation was made for a head volume of 35 cm. Knitting density – 2px 3 r. = 1 cm x 1 cm.
To work you will need:
∗ 50 g of wool yarn for the cap and a little colored yarn for decoration;
∗ knitting needles No. 2 – straight and circular
Description of knitting pattern
Let's start with the ears. To do this, dial 4p. on straight sp. We knit 16 r., making symmetrical increases on both sides:
2 rub. and 4 r. – plus 1 st on each side;
6 rub. – plus 2 stitches on both sides;
8 rub. - plus 3p. on 2 sides;
15 rub. and 16 rub. – plus 1p. from 2 sides.
Next, we transfer one eye to a circular knitting needle (22 stitches), cast on 11 stitches, transfer the second eye, cast on 25 stitches. Then you need to knit 30 rubles. (10 cm) in stockinette stitch. For the crown of the cap, we decrease only in even rows. We divide all the loops (80 stitches) into five parts and in each at the edges we subtract one stitch - per row minus 10 stitches. When 6 stitches remain. in each part - we make a decrease in each row, and not every other time. Thread a thread through the remaining loops, bring it to the wrong side, and tighten.
You can decorate and sew on ribbons in different ways – for both girls and boys.
The ears of newborns can be insulated with fur. A variant of a winter children's hat for a boy, knitted using the same pattern, but with a 2x2 elastic pattern. The children's hat with ears is ready!
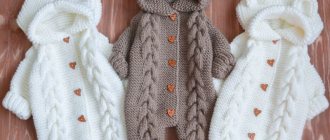
Cap-helmet
Such a warm winter hat for a newborn with knitting needles covers not only the head, but also the neck of the child. To work, you will need 150 g of mixed yarn (wool + acrylic) (250m/100g), as well as straight and stocking needles No. 4.
- We start with the central part of the cap. Cast on 18 stitches and knit with a 2x2 elastic band. A pattern is not required for this model, since all knitting is done with an elastic band.
- Having knitted 50 rows, you can begin to close the middle part.
- From the side of the middle part, pick up 18 loops.
- Next, in each row you need to make decreases in this way: knit the last loop of the central part together with the edge loop of the side part.
- Work continues until all the first loops in the middle of the fabric are knitted with the side part.
- Knit the other side of the hat in the same way.
- To knit a shirtfront that covers the neck and shoulders, cast on 18 stitches, then lift the bottom edge of the hat onto the knitting needles and close the knitting in a circle.
- Knit in the round with 1x1 rib.
- Then, in every fifth row, add a knit stitch. The result was a 2x1 elastic band.
- After five rows, add purl stitches. The result was a 2x2 elastic band.
- Knit 42 rows and close the fabric.
- To finish, pick up the stitches around the cap and knit 15-20 rows with a 1x1 rib.
- Make two pompoms and sew them on the sides. You can also sew on decorative buttons.
Hats for newborn babies can certainly be decorated, but when choosing decorative elements, try to avoid sharp and small parts. Let it be pompoms, tassels, soft lace or large wooden buttons.
You can learn more about how to knit a warm hat-helmet by watching the video master class.
Knitted hat for a newborn (14 models with descriptions)
What kind of hat should it be for a newborn?
If you know how to knit, it is best to knit a hat for a newborn with knitting needles. The most important thing is to choose soft yarn; now many manufacturers produce yarn specifically for children's things. Typically, this yarn contains wool and acrylic. The yarn should not be very thick, it is best to take 250-300m/100g yarn and knit with knitting needles No. 2.5-4.
After you have chosen the yarn, it is time to decide on the hat model.
A hat for a newborn should be without seams, so nothing will interfere with your baby. It is better if the model has ears, so you will be sure that the baby’s ears are also under reliable protection.
In this selection, many models of hats are universal and suitable for both boys and girls. All hats are given with detailed descriptions and knitting patterns .
Happy knitting and good health to your little ones!!!
You will need: 100 g of “Rovnitsa” yarn (50% wool, 50% acrylic, 100 g / 200 m) produced by the Trinity Worsted Factory, knitting needles No. 5. Pattern “Relief stripes”: (the number of loops is divided by 7 + 2 edge loops). Cast on 30 stitches using size 5 needles.
1st row: purl 3, knit the 5th loop behind the front wall and without removing it from the left knitting needle, knit the 4th loop with the front wall, knit the 7th loop behind the back wall and knit without removing it from the knitting needle 6th knit stitch behind the back wall; 2nd and all even rows: purl 4 loops, knit 3 loops; 3rd row: 3 purl loops, knit the 5th loop behind the back wall and without removing it from the knitting needle, knit the 4th loop with the front one behind the back wall, knit the 7th loop with the front wall and without removing it from the left knitting needle, knit Knit the 6th loop behind the front wall. HAT Join the yarn into two strands, cast on 21 stitches using size 5 knitting needles and knit with a 4×3 rib for eight rows. At the end of the row, 3 loops remain along with the edge loop. Leave the knitting on the needles. On other knitting needles, knit the same thing, only purl three loops (together with the edge stitch) at the beginning of the row. On the reverse side from the edge where three loops are connected, cast on 17 loops in one step. Transfer 21 loops of the previously knitted fabric to the same knitting needle and knit another 5 rows with a 4x3 elastic band. Switch to the “Relief Stripes” pattern and knit a fabric 12 cm high (6 repeats). In the 4th row of the last repeat, knit 3 knit stitches together. Along the edges of the fabric, knit two loops together. Further decreases are knitted as follows: 1st row: *1 purl, 2 knit stitches together behind the front wall, 2 knit stitches together behind the back wall* From * repeat 8 times, purl 1. 2nd row:* knit 1, purl 2* From * repeat 8 times, knit 1. 3rd row: * Purl 1, knit 2 stitches together” from * repeat 8 times, purl 1. 4th row: * 1 knit, 1 purl* from * repeat 8 times. 1 knit. 5th row: knit 2 stitches together. Gather the remaining loops onto a thread, pull them together and use the same thread to sew the hat with a knitted seam.
This beautiful and practical set of hat and scarf is knitted.
Knitted baby hat “Lullaby” from Drops Design. Size(s): 0/1 – 1/3 – 6/9 – 12/18 months. (2 - 3/4) years Head circumference: 34/38 - 40/42 - 42/44 - 44/46 (48/50 - 50/52) cm You will need: 50-50-100-100 (100- 100) gr. DROPS KARISMA yarn (100% cotton, 50 g-100 m) and straight knitting needles No. 4 Garnstudio yarn range Knitting density: 21 p. x 42 r. garter stitch = 10 x 10 cm.
shawl knitting (back and forth on knitting needles): Knit all rows. L. 1 scar = 2 r. L. PICO EDGE (back and forth on knitting needles): ROW 1 (= RS): knit all sts. L. ROW 2 (= IS): knit L until 4 sts remain, knit these sts. track. way: 2 sts together L, 1 yarn over, knit 2 sts. in each of the last 2 paragraphs. = 2 new points. in a row. ROW 3 (= RS): Slip 1st st. L., 1L, pull it through the removed st., 1L and pull the first st. through the last one on the right needle., 2 decreased sts. – then knit L the remaining sts. ROW 4 (= IS): knit all sts. L. Repeat rows 1 to 4. CAP STYLE 27-31-35-37 (41-43) pp. on 4 mm knitting needles with Karisma yarn. Place 1 marker after 4 sts. from the right edge (view from the HP). Knit in SQUARE STITCH – see the description above and, AT THE SAME TIME, knit the edge with a Picot pattern on the 4 outer sts. in front of the marker - see description above. AT THE SAME TIME, add 1 p. On the right side of the product (on the inside of the picot edge) and subtract 1 p. on the left side of the product. in this way: ROW 1 (= RS): 4 pp. Pico edge, 1L, 1 yarn over (= 1 increase), knit until 3 sts remain, 2 sts together L and 1L. ROW 2 (= IS): Knit L to the marker (knit yarn over behind the back wall to prevent holes from forming) and finish 4 sts. Pico edges. Repeat these 2 rows until the height of the product is 5-5½-6-6½ (7-8) cm. Then subtract 1 st on the right side of the product and add 1 st on the left side of the product. in this way: ROW 1 (= RS): 4 pp. edge Picot, 1L, remove 1 stitch L, 1L, stretch it through the removed stitch, knit until 1 stitch remains, make 1 yarn over and knit 1L. ROW 2 (= IS): Knit L to the marker (knit the yarn over behind the back wall) and finish 4 sts. Pico edges. Repeat these 2 rows until there is 1 row left with the IS until the height of the product is 10-11-12-13 (14-16) cm. Then knit one openwork row, with the IS, next. way: * 2 sts together L, 1 yarn over *, repeat from * to * until there is 1 st left before the marker, 1L and finish 4 sts. Picot edges (in the next row, knit yarn overs L behind the front wall to create holes). Then add 1 p. on the right side of the product in every 4th row, and decrease 1 p. on the left side of the product in every 2nd row, until the height of the product is 14½-15½-16½-17½ (18-19) cm from the typesetting edge. Then decrease 1 p. on the right side of the product in every 4th row, and add 1 p. on the left side of the product in every 2nd row, until the height of the product is 19-20-21-22 (22-22) cm from the typesetting edge. Track. openwork row with IS knit trace. way: * 2 sts together L, 1 yarn over *, repeat from * to * until there is 1 st left before the marker, 1L and finish 4 sts. Picot edges (in the next row, knit yarn overs L behind the front wall to create holes). Then add 1 p. on the right side of the product in every 2nd row, and decrease 1 p. on the left side of the product in every 2nd row, until the height of the product is 24-25½-27-28½ (29-30) cm Then decrease 1 stitch on the right side of the product in every 2nd row, and add 1 stitch. on the left side of the product in every 2nd row, until the height of the product is = 29-31-33-35 (36-38) cm. Close paragraphs.
ASSEMBLY Back of the cap = on one side of the product there are 2 full teeth and 2 half teeth. The 2nd and 3rd of the 3 prongs are located on the opposite side of the piece (= rounded prong) on the forehead. Sew the edges of the cap together. way: sew the first half of the tooth with 1 half of the 1st full tooth. Then sew the 2nd half of the 1st full tooth with the 1st half of the 2nd full tooth. Then sew the other half of the 2nd full prong to the last half of the prong. Then make a connecting seam in the center of the back of the cap. TIES Cut 2 threads 150 cm each. Twist them tightly together, pull this lace through one of the holes in the front of the cap, squeeze the lace in half, twist it again and tie a knot at the end. Make a tie on the other side of the cap in the same way.
very simple hat , suitable for beginner knitters.
Size(s): Size: (premature) 0/1 - 1/3 - 6/9 - 12/18 months (2 - 3/4) years
Head circumference in cm: approx. (28/32) 34/38 - 40/42 - 42/44 - 44/46 (48/50 - 50/52) cm
You will need: 50 gr. yarn DROPS BABY MERINO for all sizes, color No. 23, light beige, double needles No. 3, double needles No. 2.5 - for elastic
Knitting gauge: 24 p x 48 p in garter stitch = 10 x 10 cm
SQUARE STITCH (in the round): * 1p. L, 1r. And*, repeat from * to *. Knitted in the round on double needles. Dial freely (68) 80-92-96-104-(112-116) pp. on double needles 2.5 mm with Baby Merino yarn. Knit with an elastic band (= 2L/2I) for a total of (2)2-3-3-3(4-4) cm. Replace the needles with 3 mm stocking needles and knit 1 r. L, AT THE SAME TIME decrease evenly 8 pp. = (60) 72-84-88-96 (104-108) pp. Then knit in GARNIER STITCH (see description above). At a height of (9) 10-11-11-13-(13-14) cm in the trail L r. decrease evenly (6) 8-7-8-8 (8-9) pp. Repeat decreases every 2nd row. (in each knit) another (5) 5-5-5-5 (6-6-) times ( = total (6) 6-6-6-6(7-7) p. with decreases) = (24) 24-42-40-48 (48-45) pp. Next L r. knit every 2 stitches together. Knit r. And repeat the decreases next. L r. For sizes 1/3, 6/9 y 12/18 months and (2-3/4) years (do not decrease for other sizes) = (12) 12-11-10-12(12-12) pp. Pull the double yarn through the remaining loops and tighten.
Another model of a simple baby hat , but this time with ears.
Delicate hat for a little princess . Knit such a hat and your little ears will always be protected.
"Budenovka" hat with ears for a baby.
Warm hat and shirt from Drops magazine. Model BabyDrops 18-5
Hat: Sizes: 1/3 –6/9 –12/18 months (2 –3/4 years) Head circumference: 42 –44 –46 (48 – 50) cm Material: Drops FABEL studio yarn for all sizes 50 g . Color. No. 912, delicate chocolate Neck: Sizes: 1/3 –6/9 –12/18 months (2 –3/4 years) Material: Drops studio yarn DROPS ALPACA 50-50-50 (100-100) gr. Color. No. 618, beige Hat: DROPS double needles and circular needles (40 cm) No. 2.5 Knitting density: 26 p. x 34 r. With Fabel yarn in stockinette stitch = 10 x 10 cm.
Collar: DROPS knitting needles .No. 3 Knitting density: 24 p. x 32 r. With Alpaca yarn in stockinette stitch = 10 x 10 cm. DROPS wooden buttons no. 513: 3 pieces. Garter stitch (back and forth): 1 edge of garter stitch = 2 p.. Hat: The work will be knitted in the round on circular and stockinette needles Fabel yarn on circular needles no. 2.5, dial 112-120-128 (136-144) sts and knit. 8-8-10 (10-12) cm with rib = 2 knit stitches/2 purl stitches. Then knit in stockinette stitch – AT THE SAME TIME in 1st row. Distributing evenly, decrease 16-18-20 (22-24) sts = 96-102-108 (114-120) sts. After 13-13½-15 (15½-17) cm every 16-17-18 (19- 20) p. insert a marking thread or marker. Further in each 2. r. After the marker, knit 2 stitches together 5-5-6 (6-7) times and then in each row, after the marker, knit 2 stitches together. 9-10-10 (11-11) times = 12 sts. Knit on the remaining loops 2 cm = Tip of the cap. Then knit every 2 stitches together. Then cut the thread and pull it through the remaining loops. The work is equal (including the tip of the cap) approximately. 20-21-23 (24-26) cm. 1. eyelet of the cap: Fold the elastic over the top. Hold the cap with the tip facing you and use Fabel yarn on double needles no. 2.5, knit as follows: on one side at the bottom, pick up 22-24-26 (28-30) sts (knit 1 loop from each loop.). Work garter stitch back and forth - see above. – AT THE SAME TIME, decrease 1 stitch on both sides, knitting 2 outer stitches together. Perform decreases in every 4th row. 5-5-6 (6-7) times and every 2. p. 4-5-5 (6-6) times. = 4 sts on knitting needles. Knit these loops along. 2 together. Pull the last 2 loops through each other. Cut the thread and pull it through the last loop. The ear is approximately . 5-6-6½ (7-8) cm. 2. cap eye: Start 42-42-46 (46-50) sts after the first eye (these 42-42-46 (46-50) sts = middle front). Using Fabel yarn on stocking needles No. 2.5, pick up stitches by knitting: 1 stitch from each stitch, pick up a total of 22-24-26 (28-30) stitches (the back distance between the ears is 26-30-30 (34-34) stitches) . Knit further as the first eye.
Ties: Cut 3 strands of 60 cm from Fabel yarn and twist them together. Pull the lace through the bottom of the eyelet and let it curl. Tie a knot at the end of the lace and do the same on the other side.
Collar: The work consists of 2 Parts and is knitted from bottom to top. Before: Work knitted forward and backward. Using Alpaca yarn on size 3 needles, cast on 32-36-40 (44-48) sts. Knit 2 garter stitch ribs - see above. Then knit in stockinette stitch and on each side knit 4 sts in garter stitch - AT THE SAME TIME in 1 st on both sides, inside 4 sts in garter stitch add 1 st, knitting between 2 sts 1 st from the transverse thread between the loops . Add 4 rubles for each. total 6-6-6 (8-8) times = 44-48-52 (60-64) sts. Work in stockinette stitch and with 4 sts in garter stitch until work reaches 15-17-19 (20-22 ) cm. Now set aside the middle 8-10-12 (14-16) for the neck on a spare needle. Now knit each side to the end separately. Remove the loops on the right side onto a spare knitting needle. Left side: = 18-19-20 (23-24) sts. Then in each row at the beginning of each row along the inner edge of the neck close 2 sts 2 times and 1 st 2 times = 12-13-14 (17 -18) p for shoulder. After 20-22-24 (26-28) close the loops. Right side: pick up stitches from auxiliary needle = 18-19-20 (23-24) sts. Work as left side until work reaches 19-21-23 (25-27) cm = 12-13-14 ( 17-18) p on knitting needles. Knit the next row as follows t (from the front side): 2 knit stitches, 2 knit stitches together, 1 yarn over, 4-5-6 (8-9) knit stitches, 2 knit stitches together, Yarn over 1, knit 2-2-2 (3-3). Purl 1 row with knit stitches and then work 2 garter stitch ribs on all stitches. Then close all the loops. Back: Cast on stitches and knit in the same way as you did when knitting the front - however, after 18-20-22 (24-26) cm, close off the middle 18-20-22 (24-26) sts for the neck. Now knit each side separately . Place the stitches on the right side on a spare needle. Left side: = 13-14-15 (18-19) sts. Work further in stockinette stitch with 4 sts in garter stitch with - AT THE SAME TIME at the beginning of the next row to round the neck. 1 p. = 12-13-14 (17-18) p. on knitting needles. After 19-21-23 (25-27) cm, knit 6 garter stitch ribs on all stitches and then bind off the stitches. Right side: = 13-14-15 (18-19) sts. At the beginning of the next row to round the neck, cast off. 1 st = 12-13-14 (17-18) sts on knitting needles. After 20-22-24 (26-28) cm close the loops. Assembly: Sew the right shoulder. Collar : along the edge of the neck with Alpaca yarn on circular needles no. 3, cast on approximately 82 to 102 stitches (including stitches on the auxiliary needle, the number of stitches should be divided by 4 + 2). 1 purl. R. knit stitches . Then knit as follows: 6 sts in garter stitch, * k2 sts.. / p2 sts. *, repeat from *-* until 8 sts remain, finish with k2 sts. and 6 p. garter stitch. Knit like this further - AT THE SAME TIME, after 2-3-3 (4-4) cm above the other button loops, knit 1 button loop (when viewed from the front side): k2 stitches, k2 stitches together . , 1 yarn over, 2 knit stitches. Next, knit an elastic band with the last 6 stitches in garter stitch. After 3-4-4 (5-5) cm, close the knit stitch and purl the stitch. Sew buttons
The “Basket” hat is a very popular model.
The cap is a helmet with pigtails.
Hat "Elf"
Openwork cap for a newborn girl.
Warm baby hat from Drops.
Knitted hat with ears “Snowflake”
DETAILED MASTER CLASS with step-by-step photos
We also have very good selections on knitting for children on our website:
Knitted booties (15 models with descriptions and knitting patterns)
Knitted dresses for girls (13 models with descriptions)
Knitted hats for children (11 models with descriptions)
Knitted sundresses for girls
And also very popular selections for adults:
Knitted hats (12 models with descriptions)
Knitted snood (simple models with descriptions)
Knitted mitts (12 models with descriptions)
Crochet knitted slippers (12 models with descriptions)
Knitted blankets (11 models with descriptions)
Knitted scarves (selection of models)
The article was prepared for the Dashkin House website. When copying, a link to the site is required.
We knit a cap for kids
The cap is very comfortable for babies, as it covers the entire head, does not fall off thanks to the ties, and protects well from wind and drafts.
Let's look at a detailed master class on how to knit a cap with knitting needles.
You will need 50 g of yarn (acrylic or wool + acrylic) and circular knitting needles No. 3.
- Using circular knitting needles, cast on 60 stitches.
- Ten rows are knitted with a 1x1 elastic band.
- Knit the next 30 rows in stockinette stitch.
- Divide the entire number of loops into three equal parts. 20 each for the back of the head and two temporal areas.
- Knit the next front row to the black marker, and immediately after it two stitches together with the front one.
- Purl the next row up to the red marker and again, after that, purl two rows together.
- Markers can be removed. Now you can see the places where you need to make reductions. The decreases are similar to those we make when we knit the heel of the toe.
- Continue making decreases. Make sure that there are always 20 loops left in the central part. When there are 12 loops on the sides, decrease 6 loops at the back of the head.
- The entire fabric should be closed on the sides, and eight loops should remain in the center.
- We lift the edge of the sides onto the knitting needles.
- Next, continue working with the rubber band.
- Knit with an elastic band 3 cm.
- Tie bonnet ties on the three remaining loops. This can be done in knit stitch or garter stitch.
- Close the loops and thread. The knitted cap for a newborn is ready to try on!
Having learned to knit a simple cap, you can safely experiment with patterns. Any diagram with a description can form the basis of this model. Summer hats can be knitted with an airy openwork pattern, while winter hats, on the contrary, can be knitted with a dense and warm pattern. You can make a spring hat if you choose the ratio of pattern, threads and knitting density.
Knitted hat
Description
We knit ears. Cast on VIII st with dark beige thread. Work with garter knitting, inc. from two stitches in every II (second) row. IV times I st. At a distance of 4.5 cm, from the point of work, remove 16 sts for additional. knitting needle Tie a second similar ear. We knit a hat. Dark beige thread cast on 12 stitches for half the back of the head. Then attach the sts of one ear, cast on 22 sts for the forehead, attach the sts of the second ear and cast on 12 sts for the second half of the back of the head. Tie 2 cm with an elastic band 2 - 2 all 78 sts. Continue knit. stitch, adding I stitch in the middle of the first row. = 79 p. Starting from the third row, knit 17 p. jacquard pattern, starting from the VIIIth point of the diagram. Next, use a dark beige thread. knit 3 p. persons stitch, then start decreasing for the top: I chrome. p-lyu, * 9 persons. p., II p. together persons. * VII times, 1 chrome. p. Tie 3 p., then in the next. row: I chrome. n., * VIII persons. p, II p. together persons. * VII times, 1 chrome. p. Tie 3 rows, then: 1 chrome. n., * VII persons. p., II p. together persons. * VII times, 1 chrome. st. Continue decreasing one above the other in every IV row until 16 sts remain. In the next row. knit all stitches according to II. According to side return to the beginning of the river. Pass the thread through all stitches, pull and secure firmly. Sew the hat with a hidden seam. Decorate the top of the hat with a small tassel made of colored threads. ecru. Knitted tassels. Pattern for a cap in the Peruvian style.
A knitted hat with ears in the Peruvian style is ready!
Openwork hat knitting description. Knitting pattern for openwork pattern. Assembling the hat according to the description. Size for baby 1-6 months.
To make an openwork hat you will need.
Yarn for knitting (100% cotton): 1 skein of white yarn, knitting needles No. 3, hook No. 2, 60 cm of white satin ribbon ~1 cm wide
Types of loops and patterns on knitting needles
Garter knitting: can be viewed on page Knitted hat Openwork pattern: repeat. 10 loops and 12 rows according to the pattern, making sure that each yarn over corresponds to 1 simple broach along the edges of the work.
Hat knitting density
A square of the product with a side of 10 cm, knitted with an openwork pattern on knitting needles = 27 sts and 35 r.