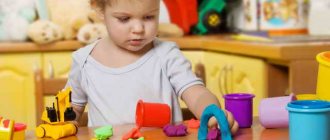
Any mother can make a rug that develops logic, thinking and fine motor skills of a baby. On it, the child will get acquainted with bright colors and textures of materials, and then, as he grows up, play various games with fairy-tale characters. In addition, while the baby is busy playing, the mother can calmly do household chores.
Rugs can be on any theme: the world around us, plants, animals or fairy tales. You just have to take into account the characteristics of your child, be patient and use all your creative imagination. And our tips on how to sew a developmental rug will help in this difficult but exciting task.
Basics of making the right choice
Children's rugs differ from each other in many ways: size, color, filling, price category and age restrictions. But as they say, demand creates supply. Based on an analysis of consumer needs, manufacturers offer us the following models of crawling mats:
- Children's puzzle mats for crawling. They consist of several parts fastened together. It is best to choose those with large membrane puzzles. They have fewer joints, which means it will be more comfortable for the baby to crawl.
- Massage orthopedic blanket. It consists of small filler particles. Such mats significantly reduce the risk of a child developing flat feet, scoliosis and other musculoskeletal problems.
- Rolled floor covering. It is suitable only for very young consumers who are just trying to learn to crawl. Over time, when the baby grows up, the size of such a rug will not be enough.
- Educational mats. They additionally contribute to the development of fine motor skills, logical thinking, and intelligence.
Both puzzle rugs for children for crawling, and roll-up, massage, and developmental coverings are made from anti-allergenic materials - wool or polypropylene. In addition to the fact that the colors are always bright and rich, each part of the rug has a different surface to the touch, and this will undoubtedly interest the baby.
Advantages of a homemade rug
- When you work on a rug, you put a piece of your soul into it. Playing with such a toy, the child will feel your warmth, love and care
- You choose the materials for its manufacture yourself and you will know exactly what it is made of
DIY educational mat for active children - You will make a rug of the most suitable size and shape for you
- The work will give you pleasure, you will be able to show your imagination and creativity
- You choose the decorations and developmental elements yourself; you can come up with them or borrow ideas you like that have already been implemented and design them in your own way.
- The rug will be unique, original and meet exactly your needs.
An original rug for developing imagination and attention
Advice: make a rug with a spare size so that as the child grows up, you can add new developmental elements that are appropriate for his age. It will “grow” with the child and will always be new and interesting.
See also: DIY crib: master class with drawings and photos
Making a developmental mat
We make a developmental mat with our own hands
First, you need to decide what exactly you want to see on your rug and draw a rough sketch on a piece of paper. Then choose a material suitable in size and texture for the base of the rug and for its lining. To make the rug soft and warm, you will need padding polyester or warm coat fabric. The latter will help the mat better keep its shape and not wrinkle during play.
Ideas for an educational square rug
Tip: choose natural or half-synthetic fabrics for the face covering. They must have a stable color and not accumulate static electricity. Chintz, linen, gabardine, and suiting fabrics with natural wool fibers are suitable. For lining, use a non-slip material. Do not use satin or satin. It is better to take chintz, cotton jersey, linen or corduroy, and woolen suiting fabrics.
Bright and colorful educational mat for children
See also: Board with locks, or “control panel” for a child with your own hands (photo examples)
Preparation of accessories
Collect all the scraps and unnecessary things that you don’t mind cutting up. Try to choose different textures, bright fabrics, with interesting patterns. Wash and iron everything. Look around your house for threads, buttons and locks. Find different colored laces, buttons and beads. Gather small toys and boxes together. All this will be useful to you in your work and this will be enough to get started.
Photo of a model educational rug for children
Then, as needed, you can search for and select the necessary materials. You may need ribbons, elastic bands, and Velcro. Metal and plastic rings, Kinder surprise boxes and broken rattles will come in handy. You can use multi-colored wool threads of different thicknesses.
Important! Do not use toys with small parts that cannot be secured to the mat; small children put everything in their mouth and can swallow them! Do not use materials that crumble, break or come off!
See also: Decorating a hall for a wedding with your own hands: photo ideas
Preparing the base
DIY educational mat for a baby
Cut panels of the same size from the main fabric, from the lining fabric and from the padding polyester. Lay them out in three layers so that the padding polyester is inside, and connect them together. Finish the edges with an overlocker, edging, or a simple hem. The base for the rug is ready.
Photo of an educational mat with overlays
See also: DIY kitchen decor: photo ideas
Creating a playing field
On the prepared basis we create a playing field according to the sketch. It could be a forest, a lake, or a flower bed, a road for cars and a river for ships. You can make a green meadow and a blue sky with clouds. We cut the parts of the required size and color, fold the edges and sew them onto the rug, first by hand and then by sewing machine.
Educational mat with small details for a small child
Tip: place the parts on a soft adhesive base (non-woven fabric), it will be easier to work with them and they will look better.
See also: DIY plasterboard arches for the hall: photos and detailed instructions
Making game elements
This is the main and most labor-intensive part of the work. You can make flowers, butterflies or mushrooms, and come up with fairy-tale houses and castles. Make cars, airplanes or boats, sew any small animals or birds. Show your imagination. They can be sewn or fixed movably, on cords or ribbons, or attached to the rug using Velcro or buttons.
Educational mat in bright colors
Tip: to make the game elements voluminous, use padding polyester to fill them.
See also: DIY kitchen furniture: DIY drawings and diagrams
Interesting ideas
- Butterflies that can “fly” from button to button
- Cars or boats moving along a fixed cord or tape
- Opening doors and windows in houses for fairy-tale characters
- Beads or buttons of different colors and sizes on a cord that can be moved
- Zippered pocket for small toys
- Bee hiding in a flower
Ideas for making a developmental mat with your own hands - A boat or car for transporting passengers
- Lace-up tent or movable window shades
- Sounding berries from fabric-lined Kinder Surprise boxes filled with pebbles or beads
- “Flying” cloud, sometimes covering the sun
- Hedgehog with mushrooms or apples on buttons
- Christmas tree with buttons for toys
Developmental mat with details for fine motor skills - Apple with moving worm
- Ladybug with legs made of beads on laces
Tip: To make a lake, use a piece of clear polyethylene or organza and place the fish underneath. For grass, a fleecy fabric of a matching color is suitable.
Educational mat with houses, butterflies and toys
See alsoYou can create original watch decor with your own hands
Securing elements to the mat
According to the sketch you came up with, place the finished elements on the rug. Sew buttons, laces and Velcro, secure toys, place game characters in places. Close the clasps and lace up the pockets. Complete each developmental composition according to the sketch you created.
Important! Check the reliability of fastening of small parts, the strength of cords and threads with beads, the integrity of loops and boxes!
An original idea for a developmental mat for a baby
See alsoCreating an interior with your own hands

