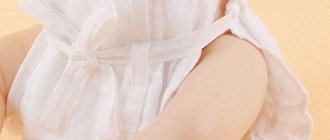
With the advent of disposable diapers, the life of parents has become much easier, since you no longer need to wash a lot of diapers and vests every day, you can simply buy disposable diapers. But it takes a decent amount of money to buy such hygiene items every month, so most parents try to make diapers themselves.
Nowadays, there is a wide variety of diapers on the children's product market. They come in Velcro, snap-on or panty style and can only be used once. After use they are thrown away. You can also buy reusable panties with special inserts that are washable. Our article will provide you with information on how to make diapers yourself from available materials. They can be used many times. All you have to do is wash the fabric and dry it.
Is it possible to do without gauze diapers?
Newborn hygiene is a very important issue.
After urination and bowel movements, the child should be dry and clean. It is important to wash the baby correctly, because boys and girls need to be washed differently. Read more about this in the article How to wash a newborn girl and boy?>>>
The first three days after birth, the baby’s intestines are freed from meconium (original feces). These days, diapers or gauze diapers get dirty relatively rarely.
But after a week, a newborn can stool up to 10 times a day.
In the maternity hospital, few people use gauze, self-sewn diapers. Choose diapers or use maternity hospital diapers, which are issued in the required quantity. In addition, you don’t need to wash them yourself, which is very convenient.
Gauze or diaper
Let's try to figure out together what the advantages and disadvantages of gauze and disposable diapers are.
Mothers and grandmothers have one constant topic of debate: what is better for the baby - modern “diapers” or homemade gauze diapers from Soviet times? Grandmothers always stand their ground: “diapers” squeeze, rub, and are absolutely not suitable for boys. Old women are sure that today's mothers have become lazy and refuse to wash diapers. And mothers write odes of gratitude to the person who invented “diapers,” because with their advent, there is a little more free time.
How to sew a reusable diaper with your own hands
Before starting to make a diaper, the fabric must be washed and the cut edges trimmed. On the Internet you can find a variety of videos on making reusable diapers; you can also use a pattern from the same.
Master class on sewing a reusable diaper:
- Trace a standard diaper from the store on a piece of paper.
- Add 1-2 cm to allowances on each side.
- The pattern is transferred to pre-prepared fabric.
- After cutting out the back side, elastic is attached along the folds for the legs.
- The next step is to sew the elastic on top.
- The finished panties must have a cotton insert.
How to sew?
Sewing a cloth diaper yourself is something any mom can do.
What will you need?
To sew a diaper for a baby, we will need:
- Diaper cloth.
- Fabric for liner.
- Mesh fabric.
- Pattern.
- Velcro closure is 4 cm wide and 20-22 cm long.
- Elastic band is 0.5-0.7 cm thick and 40-45 cm long.
- Threads.
Which material to choose?
A variety of materials are used to sew reusable diapers:
- Gauze. The most popular fabric used by our grandmothers. It can be purchased at any pharmacy, has an affordable price, and is also an environmentally friendly material.
- Chintz. Natural fabric, which does not cause an allergic reaction in children, is perfectly breathable. It is necessary to use light-colored fabrics to avoid possible allergies in the baby to dyes.
- Flannel. It is a brushed cotton or wool blend fabric. Excellent air permeability and does not irritate the baby's delicate skin.
- Madapolam. This fabric is an analogue of ordinary gauze. This is thin chintz, but denser and stronger.
Using old diapers and shirts to sew diapers will be a significant saving on the family budget. Inserts are necessary for quickly absorbing liquid after the baby goes to the toilet. That is why the main requirement for the material for liners is good hygroscopicity.
IMPORTANT! It is necessary to avoid any synthetic fabrics, as they can cause irritation, rashes and itching.
To make liners, the following fabrics are most suitable:
- Gauze. The best option is to fold it in four layers. These inserts are thrown away after use.
- Madapolam. These liners are suitable for reusable use because they do not deform after washing.
- Microfiber. Despite the fact that it is not a natural material, it will perfectly absorb moisture and will not cause skin irritation.
- Microfiber. This material will not cause any inconvenience to the baby and will quickly absorb moisture.
- Bamboo fabric. Most mommies make liners from old bamboo towels. It is preferable to use towels of light colors.
In addition to materials, the following tools are needed to sew a diaper:
- Sewing machine.
- Scissors.
- Marker.
- Pins.
Size
To sew a diaper on the inside and outside, you will need approximately a meter of main fabric and mesh fabric. Fabric consumption for the folding technique Gauze or fabric of a square or rectangular shape must be stitched along the edges.
Length and width vary:
- 60*120 cm (size of gauze diapers for newborns), 80*160 cm (for a baby from 1 to 2 months) or 90*180 cm (for a three-month-old child) – when using the “kerchief” technique.
- 60*100 cm – for folding into a rectangle.
- 60*60 cm or 90*90 cm – for “Hungarian” equipment.
Pattern
The pattern for sewing a diaper is quite simple to make. You need to take a store-bought disposable diaper and trace its contours with a marker.
REFERENCE! Reusable diapers are used from the baby’s birth until the age of two. Therefore, they are sewn according to the size of the child.
Step-by-step instruction
Sewing technology:
- Take the material and fold it in half, pin the pattern and trace it. Cut, transfer symmetrical marks to the second half. Do the same steps with the mesh fabric.
- Sew a Velcro fastener onto the front side of the material piece.
- At the opposite end of the part, make a drawstring for the elastic from the material. Insert the elastic into the hole and stitch several times.
- Finish the back of the mesh piece using a zig-zag or overlock stitch.
- Sew two parts.
- Sew elastic around the legs on the back side of the piece.
- Turn the part inside out and sew everything from the front side. Everything needs to be sewn correctly near the legs.
- Cut four Velcro fasteners measuring 2 centimeters by 4 centimeters and sew them to the marked marks on the inner layer of the diaper.
- The diaper is ready. All that remains is to insert the insert.
You can learn more about sewing a reusable diaper by watching the video:
Folding techniques
There are four methods for folding gauze diapers for newborns. This is a scarf, Hungarian and two ways to make a rectangle. Let's present each one separately, step by step.
Hungarian method
This video shows very clearly how to quickly fold a diaper using this method.
Prepare a square piece of gauze.
Step 1. Fold the fabric in half, leaving the fold at the bottom.
Step 2. The rectangle is folded again, from right to left. Make sure all open ends are on the same side.
Step 3. Take the top layer by the lower left edge with your fingers and move it as far as possible to the side. Flatten the fabric. It should look like a pyramid.
Step 4. Turn the product over. Now the bottom edge is at the top.
Step 5. On the left side you will see a square. Roll it into a roll, flattening it slightly. This part is necessary to absorb liquid.
Step 6. You should have a triangle with a spacer inside, in the middle. Its thickness ensures the absorbency of the panties. If you see that it is not wide or thin enough, roll the diaper again or take a larger piece.
Step 7. Place the gauze scarf on the changing table, with the sharp angle down.
Step 8. Place your infant on top of the product so that the top edge is in the middle of the back of the waist.
Step 9. Place the edge with a sharp angle along the baby’s legs, bring the side edges over the tummy and overlap each other. The top layer can be tucked behind the bottom layer. This will keep the product on the body.
Kerchief
Step 1. Fold the cut in half to make a square.
Step 2: Fold the fabric diagonally. You will get an isosceles triangle. If there are uneven edges or loose threads, remove them and sew the product along the edges.
Step 3. Lay the scarf on the table, one corner should be facing down. The child is placed on top. The top edge of the material should be parallel to the baby's waist so that the sides fold easily over the tummy when folded.
Step 4. The lower edge is passed between the legs and placed in the navel area. Don't pull too hard to avoid chafing your baby's crotch, but don't make the diaper loose, or liquid will spill out. Make sure there are no folds or protrusions of excess fabric.
Step 5: Hold the fabric in the middle and fold the top edges over your baby's belly. Secure them by tucking them inside the panties or tying the edges
Pay attention to the baby's behavior after dressing. If the baby is nervous, moves his legs, or wants to get rid of the diaper, it is worth checking for extra folds and how tight the product is on the body.
Rectangle (first method)
A simpler manufacturing method that takes less time.
Step 1. Make a multi-layer rectangle of gauze (see method one).
Step 2. Make a belt from thin strips of fabric. Sew the edges with a sewing machine to prevent fraying.
Step 3: Iron the pieces thoroughly.
Step 4. Place the baby on the finished rectangle, pass the bottom edge of the fabric between the legs.
Step 5. Tie the belt around the body, over the homemade panties.
Step 6. For ease of use, you can sew a belt and fabric folded in several layers, so the homemade diaper will not fall off.
Rectangle (second method)
In appearance, the finished panties resemble a reusable diaper.
Step 1. Prepare a piece of gauze. Roll it into a strip measuring 60x100 cm.
Step 2. Repeat the procedure 5 more times to create a narrow piece. Its size will be 20x60 cm.
Step 3. The strip needs to be sewn along the edges.
Step 4. Measure the circumference of the child’s hips with a tape, add 2 cm to the resulting figure. This is necessary for making other parts.
Step 5. Subtract 40 cm from the resulting measurement.
Step 6. Divide the resulting length by 2. Measure the required amount of material for two parts.
Step 7. Make the jumpers in the same way as the main part of the diaper. For example, you need an insert 7 cm wide: cut 35 cm of gauze 60 cm wide, fold it 5 times.
Step 8. Sew the jumpers. These will be the pads inside the diaper.
Step 9. Prepare the ribbons for the belt.
These should be strips no more than 2 cm wide. Sew them to the main fabric, they will hold the diaper on the body.
Step 10. Connect the parts and secure them correctly on the baby.
Gauze diapers for newborns: how to make? Find out 3 easy ways!
Gauze diapers can be easily made with your own hands without spending a lot of time and material. They are advisable to use for full breathing of the baby's skin or when diapers are not available. Diapers are classic baby hygiene products. They are made from natural material - gauze, so they are suitable even for sensitive skin.
Gauze diapers: basic information
Diapers are an alternative to diapers. They can be taken to the maternity hospital and put on the child as long as there is a need for it. It is not advisable to purchase gauze diapers, since they are produced too thin. You can make products with optimal thickness with your own hands and spend less money.
To make diapers you will need a large piece of gauze. In most pharmacies it is not of sufficient quality. Has too wide holes and thin fibers. Stocking up on good material from your mother or grandmother will help solve the problem. If they are not there, you need to go to several pharmacies and try to use the products of several companies, then you can find excellent material.
A piece of gauze should have a rectangular shape; to create some types of diapers, material with square contours is used. You need to fold the canvas in several layers. Depending on the thickness of the fabric, a different number of folds will be required.
For thick material, about 7-10 layers are needed (including folding during production), and thinner ones can be rolled until there is no risk of causing discomfort to the child from wearing ready-made diapers. Usually, thick gauze is first folded into 3-4 layers, and thin gauze into 6-8 layers. At a distance of 0.5 cm from the edge, stitch the folded gauze around the perimeter using a sewing machine.
Gauze diaper size
Depending on the age of the child, the length and width of the modules change to create comfortable diapers:
- For newly born babies: 60x120 cm.
- For babies aged one to two months: 80x160 cm.
- With the “kerchief” technique for a child from 3 months: 90×180 cm.
- With the “rectangle” technique for a three-month baby and older: 60x100 cm.
- With the “Hungarian” technique for children under 3 months: 60x60 cm, and for older babies, pieces of gauze 90x90 cm are used.
The proposed parameters can be changed depending on the size of the child, but are usually suitable for toddlers, since the relatively small sizes help to retain liquid in a confined space longer, which is necessary to keep the furniture clean. Diapers of moderate width do not create discomfort for the baby, so the baby will not resist putting them on.
Kerchief folding technique
- Step 1. The rectangular module is folded in half to form a square.
- Step 2. The matter is folded diagonally, forming something like a “kerchief”. You should get an even triangle. Protruding edges or loose threads are not acceptable. If there are any deviations from the norm, you need to trim the fabric to the required size, remove the protruding parts, and then stitch all the parts that may unravel during use.
- Step 3. The baby is placed on the resulting product. The fabric underneath is positioned with one end down and two ends up. They are placed parallel so that they are at the level of the child’s waist.
- Step 4. The lower end must be lifted, passed between the legs and gently placed on the tummy. It should completely cover the child so that if liquid gets in, there is no risk of it spilling out. You should check for gaps and, if necessary, remove them by moving the gauze. The mother must ensure that the baby is comfortable. Avoid rubbing the inside of your legs with diapers. To do this, they are positioned as evenly as possible. The formation of folds is unacceptable, as they can cause discomfort when the baby moves.
- Step 5. The diaper is secured using the two remaining ends. They can be thrown over each other and the protruding one can be slipped behind the protruding one. Usually women tie the ends. This is especially true for older children, as they toss and turn more actively. For mobile babies, the fastenings should be made more reliable so that the diaper does not fall down, causing liquid to leak onto the surrounding furniture.
Rectangle folding technique
Diapers of this type are suitable for reusable use and resemble diapers in appearance, but they are more difficult to make than other types of these products.
- Step 1. Strips measuring 60x100 cm are formed from gauze. The number of layers should be adapted to the fact that the product will be rolled up another 5 times.
- Step 2. The fabric should be folded along the long side, while the initially shorter side remains in the same position. As a result, the part is 20x60 cm in size.
- Step 3. The resulting shape is stitched around the perimeter even if some of the edges are absolutely smooth, that is, it does not contain unraveling ends. During operation, clearly defined sides of the rectangle will help prevent its excessive movement, causing the contents to leak out.
- Step 4. Two additional parts are formed to hold the diaper on the baby's belt. To do this, the hip circumference is measured using a millimeter. A centimeter is added to the resulting size on each side for a looser fit of the product to the baby’s body.
- Step 5. 40 cm is subtracted from the resulting length, that is, the strip that runs transverse to the belt line.
- Step 6. The remaining length (it will turn out to be quite small) is divided in half. This is exactly how much material needs to be measured to create jumpers in the diaper.
- Step 7. The width of the inserts ranges from 7 cm and varies depending on which position of the diaper is most convenient for the child.
- Step 8. Each insert is formed from as many layers as required for the main part.
- Step 9. Each piece is stitched around the perimeter. The products should be given the most even outline possible. The presence of protrusions or areas of increased thickness is not permissible, since the baby should not experience discomfort when wearing a diaper.
- Step 10. The finished parts are connected so that a straight line is formed at the top.
Other ways to make a rectangle diaper
Many mothers prefer to make this type of diaper in an easier way. The process of creating it is combined with putting it on the child. To format it correctly, you need to follow the algorithm of actions:
- Step 1. A rectangular sheet of gauze is formed in the manner indicated in the description above.
- Step 2. The garter is prepared in advance. It is a thin belt. It can be made from gauze. The layer should be small but elastic. To make it convenient to use this part, the contours of the gauze strip are also stitched or overcast on a machine.
- Step 3. When the components for the diaper are ready, you can iron them and leave them until you need to use them.
- Step 4. To put on the diaper, you need to place the baby on a flat surface in a comfortable position. One edge of a gauze rectangle is placed under it in advance. You need to make sure that the folded section of the diaper is located behind the baby's back.
- Step 5. The remaining fabric should be passed between the baby’s legs and placed on the tummy.
- Step 6. When the material is conveniently located on the baby’s body, you can take the prepared strip of gauze and tie it around the baby’s belt, securely fastening the diaper. It is necessary to ensure that the belt does not cause discomfort to the child.
There is an alternative! The garter can be used not as a separate belt, but can be sewn to the base of the diaper. To do this, a thin strip is sewn to each side of the gauze rectangle.
It needs to be pre-stitched and then carefully attached to the base, going slightly beyond its edges.
In this case, when moving the child, the belt will not fall off, and the risk of the diaper shifting is also reduced.
Hungarian rolling technique
This method is similar to the scarf technique, but allows for better absorption of liquid. To make a diaper you will need a square gauze.
- how to make a diaper using the Hungarian technique
- Step 1. The matter is folded in half. You need to make sure that the fold is at the top, and the two flared particles are directed downward.
- Step 2. The resulting rectangle is folded again. Its right side leads to the left. All the open ends of the gauze layers in the square are on the left.
- Step 3. Take the top layer by the lower left edge and move it to the side until it stops. The fabric is leveled. The allocated area of matter forms something like a pyramid.
- Step 4. The resulting product must be turned over. The bottom edge should be at the top when flipped over.
- Step 5. There is a free square on the left. When it rises, matter remains below in the shape of an inverted pyramid. This square piece of gauze needs to be rolled into a roll. It should be flattened a little. This part of the diaper serves for optimal absorption, so its size should fit between the baby's legs. If the width is not sufficient, you need to unroll the roll and form it more freely.
- Step 6. The finished diaper is laid on a flat surface so that two opposite corners are at the top and the bottom edge is at the bottom.
- Step 7. The child is placed on the diaper. The lower end is threaded between his legs and placed on his stomach.
- Step 8. The two opposite edges are alternately overlapped, securing the diaper on the baby. The top layer is tucked into the bottom. Wrinkles and strong unevenness should not be allowed to make the baby comfortable.
Gauze diapers can be easily made with your own hands. If necessary, they can be washed, that is, used as reusable.
Disposable diapers are also popular, but if you throw them away after a single use, you will have to remake them more often.
In order for your baby to receive only benefits from using gauze diapers, it is necessary to remove them immediately after getting wet, avoiding the formation of irritation or diaper rash.
Source: https://moy-kroha.info/marlevye-podguzniki-dlya-novorozhdennyh-kak-sdelat
Gauze diapers
Another option is gauze diapers, this is the cheapest option, because from one package of gauze you can sew 23-25 diapers. Gauze is a material that will never cause irritation to a child’s skin. The gauze allows air to pass through perfectly, and the baby’s skin does not overheat. Also, such diapers make it easier to potty train a child, because... he understands what it means to be wet.
The disadvantages include: frequent washing; up to 30 of these diapers get dirty per day. The child who has peed will immediately begin to be capricious and will have to change the diaper immediately, regardless of the time of day. Night sleep will last no more than 4-5 hours, or rather, until the child wets himself. You won't be able to go for a long walk either. during the daytime, children pee every 1, maximum 2 hours.
The size of such diapers is not universal and for each age you will have to sew a separate set. There are several techniques for making such diapers.
The first technique is called “kerchief”. To make such a diaper, you need to take a piece of gauze measuring 90x180 mm, fold it in half horizontally, and then diagonally. You will get a scarf on which the baby is laid out. The lower end of the gauze is placed between the legs, and the side edges are tied together.
The second technique is the “rectangle”. Take a piece of gauze measuring 60x100 mm and fold it lengthwise several times. The child is placed on one edge, and the other is covered on top; such a diaper is secured with a diaper or belt.
The third technique is “Hungarian”. A piece of gauze measuring 90x90 mm is taken by the top edge and folded in half, then by the right edge and folded again. It turns out to be a square; you need to turn away the outer corner to get a scarf. Next, the gauze is turned over from top to bottom, and the free edge is folded several times. It turns out to be a thickened middle, on which the baby is laid out.
And then everything is as in the first technique: the end that is at the bottom is threaded between the legs, and the side ones are overlapped and secured with a belt.
If you can’t sew a diaper yourself for some reason, you can do the following:
- Fold a piece of gauze several times.
- Sew the resulting strip around the perimeter.
- “Gut” and wash the factory diaper.
- Insert gauze inserts into the prepared diaper.
You can wash such diapers or inserts both under running water and soap, and in a washing machine at a temperature of 60-90? C using baby powder.
So, although homemade diapers have many positive qualities, they are still not ideal. Just like store-bought diapers are not ideal. Based on this, there is a great option to wear a factory diaper for your baby at night and for walks, and a homemade reusable one the rest of the time.
From “kerchief” to “Hungarian”
We have already realized that it is not a bad idea to use gauze diapers for newborns for the little ones. How to make them and then fold them in such a way that the little one is soft and comfortable?
One of the three simple techniques for folding diapers is the “kerchief fold.” A gauze measuring 90 by 180 cm should be folded in half. The second time - again in half, only diagonally, to get the shape of an ordinary scarf. Place the little one on it, stretch the lower end of the fabric between the baby’s right and left legs, throw the side ends one on top of the other. You can tie it or just carefully tuck it into the so-called belt.
Another method is called “rectangle”. Take a piece of gauze 60 cm per meter and roll it lengthwise several times. When you have a rectangle with sides of 20 cm and 60 cm, you need to tuck one edge, for a girl it should be placed under the back, and for a boy it should be placed in front. The second edge must be passed between the baby's legs. You can tie the top with a ribbon.
A more complex technique is the “Hungarian” method. The sizes of gauze can vary from 60 by 60 cm to 90 by 90 cm. Holding the top edge, a piece of gauze should be folded in half. Take the right edge and fold it in half again. The result is a square, the top corner of which needs to be turned back so that the shape of a scarf is obtained. Turn this section upside down, and the free piece of fabric must be wrapped several times. In this simple way we got a plump center. This is where you can put your little one. The lower end must be threaded between the baby’s legs, the side parts should be laid on top of each other or tucked into the “waistband” of the diaper.
DIY diapers sewn for a newborn
Before purchasing fabric, be sure to decide on the size of the diapers and be sure to consider:
- Baby's height and weight. If the product will be sewn for an unborn child, then it is better to sew diapers measuring 120x120 cm, because at the birth of a large baby, sheets 85x90 will be small.
- It is better to think in advance about the required number of sheets, and choose the fabric footage accordingly.
- It is better to choose a material with a pleasant, but not large, pattern. As for the color scheme, it is better to use pastel colors; bright colors are unacceptable.
- It is necessary to select bobbin threads of the desired color for overcasting the edges.
How to sew baby diapers with your own hands:
- Even a novice seamstress can sew a product for a baby; this process does not require any special skills;
- before sewing, the fabric must be washed so that it does not shrink in the finished product;
- dry, be sure to iron;
- carefully lay it out on a flat surface and make marks using a simple pencil or a piece of soap;
- cut the fabric along the marked lines and be sure to overlock the edges of the diaper;
- if there is no special machine for processing the edges, then they can be processed with a regular overcast stitch;
- You cannot bend the edges of the product, the baby has delicate skin and any folds can rub it;
- Be sure to wash the diapers again, iron them, fold them in a pile, and put them away for storage;
- Before this, you can sort the sheets by size and fabric thickness: thin or thick.
When preparing for a new addition to the family, future parents think about what things to buy, what material and size of diapers are preferable for a newborn, and also in what quantity they need to be purchased
Preparing for the birth of a baby is an important and crucial moment in life, so it’s important to consider everything here.
Cloth diapers come in different types:
Folded (prefold diapers). These diapers are thicker than their predecessors. They can be either one diaper or a diaper with an insert. Fastened with a special clip or with strings.
Fitted diapers. More comfortable diapers that resemble regular diapers with special fastenings in the form of buttons or Velcro. They come with either built-in earbuds or separate ones. Ideal for children who are already crawling or walking.
If you plan to use cloth diapers from the birth of your baby until he begins to go to the toilet on his own, then you need to have all of the listed types of diapers in your arsenal. The number of such diapers, you will already thin out yourself. But it is advisable to take at least 4-5 pieces of thin diapers (flat diapers) and 5 pieces (fitted diapers), and then buy more as needed (up to a maximum of 10 pieces).
If you know how to sew, then find out how you can make cloth diapers with your own hands. You will need natural fabric (very soft), a pattern and a sewing machine. Also decide in advance how the diaper will be secured; it could be Velcro, buttons or ties.
Hand made from gauze
It is better to overcast the edges of neatly laid squares using a sewing machine. In order to save time in the needlework process, you can fold the squares into triangles and overcast them. When putting them on the little one, it will be much more comfortable for the mother, but these diapers will take a little longer to dry: the triangle will be thicker than the square. That's all.
With such a detailed explanation, the question “How to make a gauze diaper?” will disappear by itself. All this is not difficult, and mom will spend little time.
For a newborn toddler, about two dozen gauze diapers will be useful. You will need the same number of diapers, because the diapers will get wet at the same time as the diaper. If the mother does not have plans for the process of swaddling, then twenty sliders will come in handy.
Can I use gauze diapers?
Every mother strives to choose the best for her newborn. With the advent of disposable diapers, hygienic and convenient, some mothers prefer to forget about reusable diapers. They are not just inconvenient, but also harmful. Is it possible to use gauze diapers, or should we really refuse them?
To make the right decision, you need to weigh the pros and cons, that is, objectively evaluate a reusable diaper. Made from gauze, it has the following disadvantages:
- a gauze diaper must be changed immediately, as moisture immediately seeps out;
- You will have to wash all bedding and clothes along with the diaper;
- if you leave a baby in a wet diaper, painful diaper rash will appear on the skin, and in the long term - dermatitis;
- The baby's and mother's night's sleep will not be complete, since they will have to constantly (5-6 times per night) wake up to change a soiled diaper;
- • you cannot walk in a gauze diaper in the cold season, at least not far from home;
- • before use, gauze diapers must not only be washed, but also ironed. This takes precious energy and a lot of time.
The danger of catching a child's cold while walking or causing skin problems is what causes young mothers' concerns about whether gauze diapers can be used. In addition, reusable diapers are inconvenient for babies after one month of age. As soon as the child begins to move actively, it is almost impossible to keep the gauze pad in the right place. The use of safety pins, as practiced in the past, is extremely dangerous.
However, a gauze diaper has many advantages:
- it will cost pennies compared to diapers, haggis and other disposable diapers, and you can use it for a very, very long time;
- gauze is a natural fabric that allows the skin to breathe and provides air flow;
- diapers are easy to wash and dry instantly;
- when urinating, the gauze does not heat up, so the baby’s body does not overheat;
- gauze does not cause allergies, unlike industrial disposable diapers.
So reusable napkins do not pose any danger to the baby, provided basic hygiene is observed. To the question whether gauze diapers can be used constantly, the answer is definitely yes. Again, if the mother changes them in a timely manner and does not allow diaper rash to appear. Moreover, in some cases, just such a diaper is indispensable.
How to make a choice?
Who can tell a modern mother not to make a mistake when choosing: what is better and more practical - gauze diapers or “diapers”? The best thing that can be advised to mothers who are hesitant to make their choice is that they should not panic and go to extremes. If there is a certain convenience in the fact that the baby is in “diapers”, and the family’s material resources make it possible to purchase them, then buy them for your health. If the mother is firmly convinced that “diapers” will only have negative consequences, then gauze diapers are perfect. Or you can simply “share the responsibilities”: use diapers for going for a walk and sleeping at night, and use regular diapers for the rest of the time.
Making different types of reusable diapers
Each type of reusable diapers has its own manufacturing characteristics.
Homemade fabric triangle diaper “Klondike” and its dimensions
To make a triangular diaper, you will need a piece of fabric:
- 60x120 cm for a newborn;
- 80x160 cm for a child 1–3 months;
- 90x180 cm for a child over three months old.
To sew a toilet item, you need to perform a number of steps.
- Fold a piece of fabric in half lengthwise, forming a square. The upper left corner leads to the lower right corner.
- Smooth out the fabric, bring the corners together.
- Pin the fabric along the edges to prevent it from moving.
- Sew the edges, leaving one gap of 4–5 cm unstitched, turn the product inside out and sew up the remaining section, turning the fabric inward.
- If desired, attach ribbons to the side edges for ease of swaddling.
For newborns, the insert does not need to be sewn into a triangular diaper, since there is no risk of it slipping or twisting. But for children of mobile age, the gauze pad should be fixed. When changing a toilet item, the soiled liner is removed and a new one is applied.
Swaddling technique using the Klondike method
- Place the product with the lower corner towards you, place the child on the fabric so that the edge is at the level of the ribs.
- Place the liner.
- Place the bottom corner of the diaper on your tummy.
- Place the left corner of the triangle over the bottom one and place it behind the back, lay the right corner overlapping on the left side under the diaper and secure it.
- Wear rompers or swaddles.
Triangular method of swaddling a baby
Rectangular diapers from diapers for boys and girls
To make rectangular diapers with replaceable inserts, use a piece of fabric 60x100 centimeters from cotton, flannel, calico diapers or bed linen.
- Fold the fabric in half lengthwise, then widthwise - you get a piece of 4 layers 30x50 cm.
- Sew along the edges, leaving a gap of 4-5 cm for turning right side out.
- Turn it inside out, straighten the seams and corners, and stitch the remaining space.
- Sew ribbons to the edges of one side of the rectangle.
Swaddling technique using the “Rectangle” method: instructions and photos
- Fold the edge without ribbons. For a girl - place it on the back, for a boy - on the tummy.
- Place a gauze pad and pass the fabric between the legs.
- Tie the ribbons and put on the rompers.
Swaddling with a rectangular reusable diaper
How to fold and tie diapers using the Hungarian method
The Hungarian swaddling method does not involve stitching, since the diaper is made from a square piece of fabric 60, 80 or 90 cm, depending on the age of the child. The instructions below clearly show how to correctly fold “origami” from a diaper. As a result of this manipulation, you get a finished toilet item with an insert.
The diaper is folded in such a way that it forms a dense insert
- Fold the fabric in half lengthwise, then again widthwise. The folds are located at the top and right.
- Pull the lower left (single) corner, right and up. You will get one side of the future scarf.
- Turn the diaper over to the other side so that the resulting corner is on the right.
- Fold the right side twice, you get a “scarf” with a liner in the middle.
The swaddling method itself is similar to a “kerchief”: after placing the baby on the diaper, lift the insert onto the tummy, securing it with the corners of the product.
This method only seems complicated, but the video clearly demonstrates it.
How to fold a baby diaper for a baby in Hungarian - video
Selecting the material and making liners
The insert can be either disposable or reusable - it all depends on the chosen fabric:
- a disposable insert is sewn from gauze or madapolam, and after one use it is thrown away;
- reusable is made from old towels, thick microfiber or other fabrics with good absorbency. Initially, take a piece of 45x35 cm, which for newborns needs to be folded along the length 4 times (it will be long and dense), and for older children - 3 times along the width (short and dense). The liner is sewn with an overlock or zigzag stitch along the edge so that the fabric does not diverge or bunch up.
The liner can be reusable from a towel or cloth, or disposable from gauze
Materials
The optimal diapers for your baby's skin include sterile products made from flannel, calico, satin, 100% cotton knitwear, and bamboo. These days, the market is overflowing with offers from unscrupulous manufacturers who make products for infants from mixed fabrics: they contain artificial synthetics, which is absolutely unacceptable for inclusion in the wardrobe of children in the first weeks of life. Thin diapers for babies are made only from natural materials that do not cause allergies, and at the same time completely absorb all moisture.
Chintz is completely natural cotton, it is very light and soft, quite pleasant to the touch for both mothers and babies. These products can be used in the hot summer, as well as at any other time of the year, if the room where the child is is well heated. Calico diapers are ideal to use. The diapers do not come apart and do not lose their appearance even after repeated washing. Moreover, they can be boiled and boiled in cases where it is necessary to get rid of contamination and destroy pathogenic microorganisms without the use of chemicals - such a need arises when the baby has a severe allergic reaction to powders.
Chintz is a cheap and affordable material; any mother can afford diapers made from such fabric.
Diapers made from muslin are as comfortable as possible for the baby, they are soft, light and exceptionally airy, however, muslin belongs to the category of elite fabrics, so products made from it have a fairly high price - a set of three items costs about 2-2.5 thousand.
For cool weather in autumn, winter and early spring, thicker diapers are made from flannel or a similar material - flannel
These fabrics are characterized by special softness, they absorb water well and, importantly, retain heat well thanks to the thick pile, even when wet. Such products are widely used not only for swaddling, but also for properly drying the baby immediately after bathing.
The most popular type of diapers are knitted ones. Like all other products for babies, they are made from 100% cotton fabric, however, they are distinguished by their ability to stretch, thanks to which they take a shape that is comfortable for the baby, are more physiological and comfortable, and also allow the baby to move his arms and legs without interference without squeezing the body in any way.
We sew ourselves
To make a disposable diaper you will need material and a needle and thread. Next follow the instructions:
- Prepare a cut of the required size, 80 or 100 cm, depending on the age of the child.
- Overcast the edges of the fabric, turning 1-2 cm on each side. This way the material will not fray or unravel, and the product will last longer.
- Fold the finished piece in half to make a square. Turn the fabric over so that the fold is facing down.
- Hold the top edge with your right hand, and with your left hand move the bottom edge to the center of the top line.
- Turn the workpiece over to the other side and wrap it in the same way.
- You should get a triangle with a seal in the center. If you sew up the folds, the product will be more convenient to use, but thick edges take a very long time to dry.
We invite you to watch a detailed video tutorial on how to sew a gauze diaper yourself using a sewing machine.
Try out your masterpiece. Place it on the table so that the top is at the bottom, place the child in the center. Fold the corners over the baby and place the sides on top of each other. Ready. It is better to wear panties or a diaper over the top; a homemade diaper is not secured to the body, so it can slip and unwind. Ideal for boys and girls.
What materials will you need?
Any parent can handle the task of sewing diapers. To make it at home you will need a minimum of materials and time.
At the very beginning of the process, you need to decide on the material for the diaper. Regular gauze will do for this. Once you have acquired the necessary material, you need to understand what kind of diaper you need. One-time or reusable. If you want to make a reusable one, then the gauze can be replaced with cloth. This fabric should be soft and washable. Such material should not bring trouble to the child.
Now there is madapolam on store shelves. This fabric is similar in characteristics to thick gauze. If you sew it around the edges, you get a reusable diaper. Most people have a lot of unnecessary bed linens at home. After a large number of washes, bed linen becomes soft. His laundry can be used to make homemade diapers.
If you don’t have a sewing machine, you can buy ready-made material in the store. If you do this, then the matter will remain small - you will only have to learn how to fold the material correctly.
In this article we will talk about gauze diapers, their sizes and folding techniques. The size of the required material depends on the shape of the product. What it will be is up to you to decide.
Learn how to make simple diapers from gauze with your own hands in MK
To make gauze diapers we will need:
- Gauze (for one diaper - one square meter).
- Scissors.
- Thread and needle.
- Elastic band (if necessary).
Choose gauze with a dense structure. Loose material will quickly fail - after several washes, the threads will “come apart”, lumps will form and such a diaper will become unusable.
The dimensions of the original diaper blanks depend on how large the child is and what folding technique you choose. Keep in mind that after cutting the fabric into pieces of the desired shape and folding it into several layers, it must be overcast along the edges.
The first folding method.
Fold the gauze diaper using the rectangle technique. It can be made in 2 types: with and without elastic. A diaper without an elastic band is suitable for a child who has not yet learned to crawl and walk.
- To make it, take gauze measuring 60x100 cm, fold it in half lengthwise, and then crosswise several times.
- The result is a small rectangle, reminiscent of a feminine pad, but longer (20x60 cm).
- We trim it around the perimeter to maintain its shape.
- Fold one long end of the rectangle. For girls, we place the folded end with their back, and for boys, the folded end will be in the front. We do not tuck the other end, but thread it between the baby’s legs.
- The diaper is ready. We tie it with a gauze rope or press it with an elastic band of sliders.
If you want to make a diaper with an elastic band for older children who actively move and roll over, then the manufacturing principle is the same, only we sew the elastic band into a ring and put it on the child’s stomach, putting the ends of the diaper under such fastening.
Second folding method.
Let's learn how to fold a diaper using the scarf technique. Progress:
- Take gauze measuring 90x180 cm. Fold the piece in half to get a square, and then diagonally. The result is a headscarf made of 4 layers of fabric.
- We sew the resulting “kerchief” along the edges so that it does not unravel.
- We place the newborn on the scarf, bend the lower end to the navel between the legs, throw the free edges over each other or tie.
The diaper is ready. This option is suitable for newborns from birth to 3 months.
The third folding method.
The last folding method is called “Hungarian”. This option can be used when making a diaper for a 4-5 month old baby. We roll it up according to the following instructions:
- Fold a piece of gauze measuring 90x90 cm in half.
- Fold the resulting rectangle in half.
- We move the upper corner of the resulting square to the side so that a scarf is formed.
- Turn the product over.
- We roll up a loose piece of gauze in several layers to get a compacted center.
- We place the baby on the triangle, thread the lower corner between the legs, and place the edges on top of each other on the baby’s stomach.
This technique is demonstrated step by step in the photo below:
There is another way to make a diaper using gauze. Let's call it “second-hand”, since in production we will use a purchased disposable diaper as a basis. We separate the soft part from the used disposable diaper, leaving only the base. Roll the gauze into a rectangle the size of a diaper and place it inside
It is important to monitor the filling and promptly change the gauze pad, since contact with urine can cause irritation.
We reviewed the main existing techniques for folding gauze diapers. When making them, keep in mind that you need at least 20 of these diapers. You can attach them to your child in any way convenient for you:
- Elastic bands with Velcro.
- Putting on top the romper with elastic bands or a bodysuit.
- Wrapping the legs in a diaper.
- Sewing and attaching gauze ties.
Believe me, every woman can make a diaper out of gauze, even those who don’t know how to sew. You just need to fold the gauze using one of the methods indicated above; do not process the mono sections. Such a diaper will last less and will not look as neat, but its beneficial properties will not decrease.
Parents decide
So what are the best diapers? How good are gauze diapers for newborns? How to make them comfortable for children? Is it worth sewing gauze diapers yourself to absorb all the “miracles” of endless washing and chronic lack of sleep for the child and parents? The inventions of modern civilization will give every woman the opportunity to experience completely different aspects of motherhood, different from washing, ironing, cleaning, cooking: the joy of seeing her own little face, listening to the even breathing of a sleeping baby, enjoying walks in parks and squares, living calmly and without tears.
Features of using a gauze diaper
Reusable gauze diapers are washed after use in warm water and soap, then dried and ironed, and used again. This is a cheaper and more economical option. In addition, it becomes indispensable for children with allergies. Some children develop skin rashes, redness and itching after wearing store-bought diapers.
Advantages of a gauze diaper:
- Availability and cost-effectiveness;
- Reusable;
- A light weight;
- Hypoallergenic material;
- Good air permeability;
- You can do it yourself;
- They allow the baby's skin to breathe, so they do not cause diaper rash in the baby.
Among the disadvantages, it can be noted that homemade gauze products need to be washed and ironed regularly. Gauze does not absorb moisture, so it gets wet quite quickly and requires frequent changes. This diaper should be changed immediately after it gets wet. If a child is wet for a long time, irritation appears on the skin, despite the safety of the materials.
But, despite the disadvantages, many mothers prefer gauze products to reusable diapers due to their cost-effectiveness, availability and safety. In addition, if necessary, you can quickly make such a diaper yourself. Let's look at how to sew a gauze diaper with your own hands.
Disposable diapers
A huge advantage of “diaper” is that the child remains dry, no matter what happens. The time that was spent on washing and ironing diapers is freed up, giving mom the opportunity to spend an extra minute with her beloved child and play with him. When using “diapers”, there is no need to wash the described carpets and rugs, sofas and armchairs.
The disadvantages are the high price of the product. In addition, there are certain rules for wearing “diapers”: the baby cannot be “wrapped” in it for more than 6 hours, because this can lead to overheating and diaper rash. Between changing diapers, you should ensure that your baby's delicate skin is ventilated.
Techniques for folding gauze diapers
To learn how to make diapers with your own hands, you need to master one or more folding techniques. For this purpose, it is best to find and study the appropriate master class. Today, most often, mothers try to fold a homemade diaper in one of three ways:
- Kerchief. Take a piece of fabric 90 by 180 cm and fold it in half. Then we fold it again, but this time diagonally. We lay out the resulting triangle with the wide base up and the top down, and place the child on it. We pass the lower end of the fabric between the baby’s legs, and tie the side parts together. We fix the interfering ends.
- Rectangle. We will need a piece of gauze 60 by 100 cm. We fold it several times so that we get a rectangle of 60 by 20 cm. If we are working with a girl, then we place one edge under the back, if with a boy, then we first place the canvas on the front part. We pass the second end between the legs and secure the canvas with a rope. Today, many mothers additionally sew designs from soft fabric with ribbons, into which you simply need to insert a rectangular piece.
- Hungarian. To make a diaper with your own hands, take a piece of gauze measuring 90 by 90 cm or 60 by 60 cm. Fold it twice to get a smaller square, fold it and get a triangle. We turn away the free edge to form a bent triangle and turn the entire structure over to the reverse side. We fold the bent edge several times to get a multi-layered rectangle, and place the baby on it with his back. We thread the lower edge of the structure between the legs of the baby, tuck the side parts behind each other or tie them together.
After a short practice, the panties will gather automatically. Given the simplicity of the designs, disassembling them for washing is very simple, it will only take a few minutes.
We sew for our beloved children
Of course, now that the word “shortage” has already been forgotten, it is quite possible to buy ready-made gauze diapers. But mothers with a lot of experience can advise making a gauze diaper for a newborn with their own hands, because pharmacy ones are thin and small in size.
The manufacturing process is not as complicated as it might seem. It is enough to take a piece of gauze (another good option is old cotton bed linen, because after numerous washes it becomes very soft, which is suitable for the delicate skin of a newborn) and cut it to the required size. The size of gauze diapers used for a newborn will be just like 80 cm by 80 cm squares or 1 meter by 1 meter.
For the little ones, it is preferable to take a smaller size so as not to wrap around excess fabric. The baby will be uncomfortable. When making a gauze diaper with your own hands, you must remember that you will need from three to five layers of gauze, depending on its density.