The immune system of a newborn child is not yet sufficiently formed to independently resist viruses and bacteria. Therefore, parents create favorable conditions for the life and development of the baby. One of the measures to prevent harmful bacteria from entering the baby’s digestive system is the mandatory sterilization of feeding bottles. For these purposes, a special device is used - a sterilizer. But modern mothers do an excellent job of this task when using a microwave oven.
- 2 Rules
2.1 Without sterilizer
- 2.2 With sterilizer
Why do you need to sterilize dishes for infants?
Before considering the available sterilization methods, it is necessary to answer the question: “Do dishes for babies need to be subjected to any processing?”
Russian experts strongly recommend sterilizing containers intended for feeding a baby, as well as baby nipples, before each use. The thing is that the nutrient medium that forms after milk and similar artificial mixtures is an excellent place for the proliferation of harmful bacteria and foreign microorganisms. In addition, young parents need to understand that a breastfed baby and a formula-fed baby need different protection, since mother's natural product contains all the necessary substances that help to naturally strengthen the immune system of a small child.
But foreign experts hold different views. In their opinion, babies need to be adapted to interact with the external environment, so sterilization of feeding bottles is absolutely not necessary.
Kaleidoscope of opinions
Breastfed and formula-fed children have different levels of immune protection against bacteria. Our pediatricians are of the opinion that it is imperative to sterilize children's utensils and accessories in the form of pacifiers and toys. Foreign doctors have a radically opposite point of view. They argue that babies need to be adapted to interact with the external environment, so sterilizing feeding bottles is absolutely not necessary. Every young mother chooses the best for her child, so the choice of protection against bacteria and viruses is also within her competence.
Sterilizing bottles at home
The baby's immune system is not yet fully developed, and simply washing objects that come into direct contact with her mouth is not enough. Sterilization will help prevent the penetration of microbes that can cause nausea, vomiting, diarrhea, and abdominal pain into the baby’s body.
Before you start sterilizing baby bottles, you need to prepare them. The preparation process includes the following:
- Pre-rinse in running water;
- Rinse with warm water and a mild detergent and clean the inner surface with a special brush. If the milk residue is greasy or difficult to remove, water may not do the job.
Preparing for sterilization
Important! It is better to use a special liquid for washing children's dishes or baking soda.
- Rinse thoroughly using several waters. The foam from the detergent must be completely removed.
On sale you can find bottles made of glass and plastic. Both types can be washed without problems, but glass ones are better sterilized. Plastic ones are not so resistant to temperature influences; they can become deformed. The most dangerous thing is that plastic from unscrupulous manufacturers can release harmful substances that end up in the baby’s diet.
Important! If nipples or bottles show signs of damage, they cannot be continued to be used, as dangerous microorganisms get into small cracks and are not removed by washing.
In a home or apartment, you can sterilize bottles and other children's items in different ways. Each mother determines the optimal method for herself.
Sterilization can be performed by physical or chemical methods. At home, the former are more often used. Basically we are talking about thermal sterilization - exposure to high-temperature steam or boiling water.
Rules
Before any sterilization, bottles are thoroughly washed, removing all food debris and stubborn dirt. To do this, pour warm water into a large basin, add a few drops of detergent, spin the bottle and wash each part thoroughly. After this, everything is thoroughly washed with warm water.
Without sterilizer
To properly carry out the sterilization process, you must strictly follow the proposed instructions:
- Before placing children's dishes in a plastic container, wipe them dry.
There are special brushes for washing baby bottles with a convenient detergent dispenser on sale. - Use a soft cloth to wipe all internal surfaces of the container to prevent dust from entering.
- The bottle is placed in a container. Due to the fact that bottles can have different sizes, a plastic container should be purchased in such a size that the bottle can be placed in it freely.
- The container is tightly buried, placed in a microwave oven and the process is started, most often for a minute and a half.
The container goes into the microwave - Once completed, the container is carefully removed using a towel, as the container itself will be at a high temperature.
- The baby bottle is removed, wiped dry, and then it is ready to be used.
- If you plan to use it a little later, then the bottle is placed in the refrigerator.
- Each bottle is sterilized separately in the manner described.
Baby feeding bottles should always be clean, regardless of the child’s age. But bottles need to be sterilized until the baby is one year old. It is by this time that children's immunity will be strong enough to resist harmful bacteria.
With sterilizer
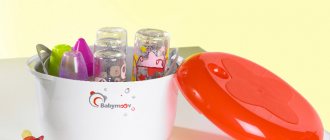
In stores that sell children's products, you can purchase a special sterilizer that can be used instead of a plastic container. The sterilization process is almost the same, with the exception of some details. The sterilizer is wiped, the bottle is installed, water is poured into a certain compartment and the timer is set for the time specified in the manufacturer’s instructions. Here you should definitely take into account that the bottles inside the sterilizer must be unclosed so that the increasing pressure inside does not burst them.
Special baby bottle sterilizer for microwave oven
What methods of sterilization exist?
Today there are several ways to sterilize bottles at home. All of them have been tested by many years of experience, and many are very relevant and modern, that is, they completely solve the problem of disinfection of children's supplies. To be aware of all the possible options, we will study the methods of sterilizing bottles in detail.
Boiling
The simplest and most proven method of disinfection is boiling. The main beauty of this method is that you can do without any additional devices or special equipment. To completely disinfect dishes, you just need to boil them for some time.
- Place the pre-washed utensils thoroughly in a clean pan, fill the pan with water and bring to a boil.
- Successful sterilization will be achieved when the children's dishes are completely covered with water. You can place a plate or cup on top as a weight to prevent the bottles from floating.
- It is recommended to boil the dishes for 3 to 10 minutes.
- After disinfection, the bottles must be removed and cooled, that is, completely prepared for use for feeding.
- It is better to sterilize children's dishes in a separate container, which should be chosen for constant use.
Boiling is a processing method familiar to our grandmothers.
It has significant disadvantages - time costs and adverse effects on the material of some bottles. Of the disadvantages of this sterilization method, the most significant is that the rubber and plastic parts of the dishes deteriorate under the influence of boiling water. If you want to extend the life of the bottles, try another method - steaming.
Steam treatment
A more delicate method of sterilization in relation to children's dishes is steaming, but with such gentle treatment it is as reliable as boiling.
- The old “grandfather’s” method of steaming is in a colander over a boiling pan.
- A more modern option is an electric sterilizer or the more common steamer.
Both options require thorough preliminary washing of accessories. In the first case, the bottles are placed in a colander and placed on top of a pan of boiling water. How long does it take to process? You need to sterilize with steam for 10 minutes.
A steam sterilizer is not much different from a regular steamer, but its containers are designed specifically for bottles and jars.
Let's give some useful tips when using this method of disinfection:
- Place bottles and teats with the opening facing down for maximum sterilization efficiency.
- You should take out the bottles only after the device has completely cooled down, otherwise you may get a severe burn.
We suggest you find out at what height you should hang a TV in the bedroom
Steaming has become more convenient and accessible since the conventional steamer came onto the market. Everything is very simple: you need to place the bottles in a steamer with the neck down, add water to a special reservoir and turn on the device for 15 minutes.
Microwave
Special sterilizers have also been developed for microwave ovens, which are very easy to use. In the absence of special devices and devices, clean glassware is quite suitable - the main thing is that this container fits baby bottles and it can fit in the microwave.
A microwave oven can also be an excellent assistant for sterilization - you either need to purchase a special container or use suitable glassware selected from household items
Multicooker
A multicooker is also great for sterilizing children's dishes. The sequence of actions is as follows:
- pour water into the multicooker, place a special disk on top for steaming, place thoroughly washed bottles on it;
- close the lid of the device and turn on the “steamer” mode;
- Some models even have a special “sterilization” mode - disinfection in this way will be even easier and more convenient.
Currently, there are many ways to sterilize children's dishes. Most of them are time-tested, many are relevant and modern, which is why they completely solve the issue of disinfection of objects intended for babies, including bottle nipples.
It is worth listing the most popular methods of processing children's dishes:
- boiling;
- steam treatment;
- sterilization using a microwave oven;
- using a multicooker, etc.
Every mother has the right to choose the method that suits her.
Microwave sterilization methods
As practice shows, our young mothers prefer to play it safe. For this reason, sterilizing children's dishes in the microwave takes a leading position. Let's start with the fact that the baby's bottles should be thoroughly washed from the remains of drinks (juices, milk) and food (porridge, soups). To do this, you can use either standard cleaning methods using salt, soda, or you can purchase a special liquid at a baby supply store. Don't forget to buy special long brushes so that you can reach the very bottom of the dishes. They cost pennies, and the ease of use is obvious.
Unscrew the bottle onto its parts (container, cap, nipple), place them in a bowl of cold water and place in the microwave. Sterilization takes approximately 6-8 minutes. This time is enough for the water to be brought to a boil, including the sterilization process itself. You need to focus on the set microwave power mode.
Alternatively, you can purchase a special steam sterilizer. It is used specifically for microwave ovens. The device is simple and understandable. There is a lighter version in the form of packages. There are marks on them, to which water is poured, the disassembled bottle is loaded, and then put in the microwave. Surprisingly, these bags are reusable. You can safely sterilize them up to 20 times.
These sterilization methods are absolutely simple. Choose which one you like best. The operating principle is the same. The only question is convenience and efficiency. If we talk about bags, they are hermetically sealed and take up little storage space. The home method with a bowl is economical, but takes longer to sterilize. And purchasing a special sterilizer is an additional expense. Whatever option you choose, the main thing is that your baby will be protected from bacteria and infections during feeding.
Back Next
Mistakes during sterilization
https://www.youtube.com/watch?v=MUhW-fzLtzM
When carrying out sterilization, it is necessary to follow a number of rules that will help make the process effective:
- Mom is obliged to follow the rules of hygiene. Before using sterile bottles, she should wash her hands thoroughly with soap;
- In order to sterilize children's utensils, you need to have separate dishes, and not the one that is used for preparing food for all family members;
- Don't be afraid to use detergents if the residue on the bottle is greasy and difficult to remove;
Important! The risk of poisoning from dishwashing liquid is incomparably lower (and even impossible with thorough rinsing) than the risk of food poisoning.
- You need to think carefully before purchasing a bottle. Oddly shaped bottles, such as those with a hole in the middle, are suitable for drinking water rather than milk. They are very difficult to wash;
Bottles of unusual shape
- If you put breast pumps in a slow cooker or microwave without adding water, they can become deformed.
Processing methods
Processing items for feeding includes two stages:
- The washing up.
- Sterilization.
Mothers choose for themselves how to wash baby bottles. The safest way to do this is to use a well-known detergent for washing children's dishes - ordinary soap (laundry or baby soap), grated and diluted with water. It washes away food residues well, helps remove the milky smell and does not cause allergies. How to wash bottles correctly? We pour the soap solution inside and wash it manually with a brush, since it is impossible to wash baby bottles without it.
Synthetic detergents for washing children's dishes also wash well, but they should be selected carefully, carefully reading the composition. Before you buy baby dishwashing detergent that advertises as cleaning well, you should open the bottle and smell what it smells like—sometimes that’s enough to decide whether to put the bottle in your cart or put it back on the shelf.
When choosing what to wash children's dishes with, it is important to ensure that the containers are thoroughly rinsed after washing.
The next step is sterilization. There are many ways to sterilize baby bottles at home, both long-known, time-tested and experienced by many generations, as well as modern ones.
They are processed:
- in boiling water;
- in a sterilizer;
- in the microwave;
- in a slow cooker;
- in a steamer.
If previously the only way to radically clean both adult and children's dishes was boiling in an ordinary large saucepan, now many people prefer to use multicookers, double boilers and microwave ovens (ultra-high frequency) for this purpose. And using a detergent for washing children's dishes such as soluble disinfectant tablets (Milton, Bebe Confort), you can carry out cold disinfection. With its help, it is possible to sterilize plastic bottles, since it is impossible to boil them - high temperatures are excluded when processing plastic. After using the tablets, be sure to boil the water and rinse the containers.
How long to sterilize bottles
In accordance with international experience, pediatricians recommend sterilizing bottles, pacifiers and other items that a baby can put in his mouth until the age of 4 months. It is impossible to keep the child isolated from the external environment for any longer. To strengthen his immune system, he must come into contact with bacteria.
In the case of breastfeeding, the bottle into which water will be poured will be enough to sterilize once a week. When artificial or mixed feeding, formula bottles are sterilized every 2-3 days.
After 4 months, you can continue sterilizing every 2 weeks; on other days, it is enough to wash the bottles with hot water and soap. When the baby is 6 months old, sterilization can be stopped.
Much depends on the baby. If he is very sensitive or prone to frequent mouth sores or diarrhea, he will need to continue sterilizing the bottles.
Important! Sterilization is needed even when the baby is already one year old, if the child is transported to other climatic conditions (especially warmer ones).
Features of the procedure. Description
New mothers and fathers who have chosen the method of sterilizing children's items using a microwave need to follow certain conditions and rules during the procedure to achieve the greatest effectiveness. If the process is not organized correctly, it is possible not only not to achieve the desired result, but also to cause significant damage to the appearance of the dishes and nipples.
First you need to unscrew the bottle onto its parts (container, cap, nipple). Then you need to place them in a bowl of cold water and put them in the microwave.
You can sterilize baby bottles in the microwave in special bags with special marks up to which you can pour water. The disassembled bottle is loaded into bags filled with water and then placed in the microwave. The capacity of sterilization bags directly depends on the manufacturer's brand. For example, a Medela bag can hold 3 standard-sized baby bottles at once.
We suggest you read How to restore a bra
A huge advantage of sterilization bags is that they are reusable. You can carry out the procedure for processing children's dishes in them up to 20 times inclusive. In addition, the procedure time in the microwave when using special packages is reduced and is approximately 3-5 minutes.
You can sterilize bottles in the microwave using a device that fits directly into the microwave oven. This device is called a steam sterilizer. It is a container into which water is poured. The device is quite simple and easy to use. The device is placed in the chamber and the microwave is set to maximum power. The whole procedure takes no more than 10 minutes.
How to sterilize bottles in the microwave in different ways
Feeding infants should be preceded by sterilization of bottles, which will destroy possible bacteria that can cause disease that the infant's immune system is not yet able to fight. Sterilization, like washing, is mandatory every time you feed your baby.
You can make the process easier by using a microwave oven, if the bottles are suitable for heating in it. How to sterilize bottles in the microwave is described below. The procedure will not destroy the integrity of the bottles and will not introduce foreign substances into the baby’s milk.
You can use:
- a special sterilizer,
- special packages,
- just a saucepan.
To process in a sterilizer you will need the following:
- sink cover;
- 4 soft towels or napkins;
- latex gloves;
- dishwashing liquid;
- round hard brush;
- hot water;
- a plastic container suitable for heating in a microwave oven;
- bottle sterilizer.
Instructions on how to sterilize baby bottles in the microwave
Rinse your kitchen sink with warm water, removing any food debris or traces of grease. Wash your hands thoroughly under running water. Dry them with a soft towel or napkin and put on latex gloves.
After plugging the sink, fill it with warm water and add dishwashing liquid.
Remove nipples from bottles. Place pacifiers and bottles in soapy water.
Wash the bottles thoroughly with a stiff brush to remove any remaining milk or stubborn dirt. Then remove the stopper from the sink and rinse the bottles under running water. Dry bottles and nipples with a soft towel or tissue.
Sterilizing bottles in the microwave
Wipe the inside of the plastic sterilization container with a clean, soft cloth to remove any dust. You should use a container slightly larger than the bottle so that it fits completely.
Place the bottle in a plastic container and place the container in your microwave. Set the timer for 90 seconds, close the door and press Start to begin the sterilization process.
Using a clean, soft towel or napkin, remove the plastic container from the microwave. After removing the bottle from the container, dry it with a clean towel and place it in the refrigerator if you are not going to use it right away. Otherwise, pour milk or formula into the bottle and secure the nipple to the neck.
Sterilize other bottles in the same way, each bottle being sterilized separately.
Sterilizing Baby Bottles in the Microwave: Tips and Cautions
You can purchase a bottle sterilizer sold at retail and online baby supply stores that is used in the same way as a plastic container. Dry the sterilizer with a clean towel and place the bottle inside. Fill the sterilizer with the recommended amount of water, put it in the microwave, set the timer on the timer recommended by the sterilizer instructions, and follow steps 3 and 4 of our article.
Do not close the bottles during sterilization, this will cause pressure to build up inside them and may cause an explosion.
It should be said that in addition to a special sterilizer, there are also reusable bags for sterilization in the microwave.
They are produced by many companies involved in the production of children's products, for example, Medela, Philips and others. Sterilizing bottles in such bags is very simple: fold the dishes, pour in water, close the bag, put in the microwave (sterilization time is indicated on the bag, from 90 seconds to several minutes).
In order not to forget how many times the package has been used, you can mark each time on a special plate. For safe use, some manufacturers have included a drain spout on the side.
These bags are very convenient to use not only at home, but also to take them with you on a visit or on a trip.
If you do not have a sterilizer and bags, then use ordinary glassware.
Pour cold water into it, put the washed bottles and put in the microwave for 8-10 minutes at maximum.
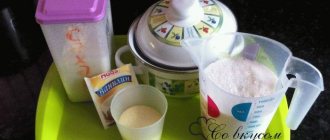
Dilution of formula for newborns
Preparing food for a baby is an important process. You need to know how to prepare formula for a newborn so that your baby receives healthy and tasty food every day that will help him grow and develop.
To feed your baby high-quality nutrition, you need to buy a good formula that is suitable for his age and other indications. For example, for the little ones, Similak Premium, Nan, Nestozhen and other brands received good ratings from doctors and parents.
Before diluting formula for newborns, you need to purchase bottled water intended for children. It contains a minimal amount of microelements that can overload the child’s kidneys; such water does not need to be boiled. If bottled water is not available, you can use filtered tap water, but be sure to boil it first.
Breeding formula
Infant formula is valuable and healthy for the baby if it is prepared exactly according to the included instructions. They indicate how to properly dilute infant formula and also contain other necessary information.
What to pay attention to:
- The proportions of powder and water are most important for a child. The box with the product always indicates how many scoops of powder need to be diluted in a certain amount of water, the age of the baby, as well as the number of servings per day;
Important! Preparing a mixture that is too thick or too watery can harm your baby. The baby’s digestive system may not be able to cope with the increased amount of microelements and protein in one serving. If you dilute the powder with too much water, the child will not get enough food.
- If the manufacturer indicates that the mixture is suitable for consumption within 4 weeks after opening the package, then after this period it must be thrown away;
- The child grows, so the amount of food gradually increases. If at 6 months of age he needs to drink 180 ml of the mixture, then after 2 months he will drink 210 ml. When diluting more food, the proportions of water and mixture are maintained;
- Breeding technique. You need to dilute the powder by adding it to a bottle filled with water, and not vice versa, adding liquid to the powder. Then gently rock the bottle until the mixture is completely dissolved. Vigorous shaking will cause the milk to froth;
- It is important to familiarize yourself with information about the temperature of the water used. If it is too cold, the powder will not dissolve and forms lumps.
Mixture temperature
To make eating effective and comfortable, you need to know what temperature the formula should be for feeding a newborn.
Important! Mixing the powder with boiling water destroys the valuable vitamins and nutrients contained in the mixture. To ensure that the product formula retains its properties, it should not be prepared at high temperatures.
The best formula temperature for feeding a newborn is 36-38°C. The product is usually prepared at a temperature of about 40°C. It is preferable not to provide food for a newborn in advance, but to prepare it right before use. It is also forbidden to leave uneaten milk for a later date - dangerous pathogenic microorganisms can form in food that has come into contact with the baby’s saliva.
Algorithm for bottle feeding a baby:
- Dilute the required amount of mixture in a clean bottle. Sometimes it is necessary to pour in breast milk, which must first be expressed;
- Install the nipple and make sure that the milk does not flow out in too frequent drops;
- Measure the temperature of the milk by applying a couple of drops to the skin of your wrist;
- Give the bottle to the child in your arms. In this case, it should be held at approximately an angle of 45°;
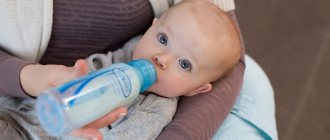
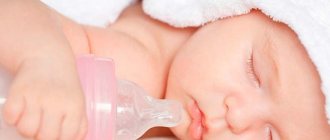
Feeding a baby from a bottle
- When the baby has finished eating, lift him upright and maintain in this position for about 5 minutes. This will allow air to escape if the baby burps, and food will not enter the respiratory system.
We suggest you read: Is it possible to put heavy objects on the refrigerator - Is it possible to put on the refrigerator: a multicooker, a TV, a microwave, flowers
It is beneficial for the child to come into contact with the outside world and bacteria. This way his body will learn to produce antibodies. Sterile bottles and pacifiers do not weaken the newborn’s immunity, but only protect his digestive system from E. coli and other microbes. While the child is small and weak, it is better not to take risks and regularly sterilize baby feeding equipment and pacifiers.
Treatment with a steam sterilizer
The main advantage of a steam sterilizer over its electronic counterpart is its relatively low price. You can purchase a special device for microwave ovens for an average of 1,700-2,000 rubles. The cost of electronic devices is much higher, can reach 10,000 rubles. The steam sterilizer can process 4 large bottles and up to 6 standard bottles at the same time.
The disadvantage of devices designed for microwave ovens is the inability to process metal utensils. Placing such items in the container is strictly prohibited to avoid damage.
Special packages
Many manufacturers whose activities are aimed at producing children's goods are constantly improving their technological processes and releasing new products that make many jobs easier.
Thus, currently you can purchase special packages designed for sterilizing children's dishes in a microwave oven. The great thing is that such bags can be used several times (the quantity is indicated by the manufacturer). The sterilization process is quite simple. The bottles are placed inside, water is poured in, the bag is closed and placed in the microwave for a minute and a half. To avoid getting burned, you should first drain the water and then open the bag. Some manufacturers have specifically installed a drain spout for this purpose. The good thing about such bags is that you can take them on any trip, as they do not take up much space.
Sterilizing feeding bottles using special bags is not only simple, but also convenient
Using special bags to sterilize bottles in the microwave is a popular method. However, one package cannot be used for more than 20 sterilization cycles.
Disadvantages of sleeping on your side
- This can cause shoulder and hip pain if you have a very old mattress or if you have muscle or joint injuries.
- Wrinkles may appear and the result may be a swollen face upon waking. If a person presses their face into a pillow, fluid accumulates in the area, causing swelling and thus wrinkles in the skin, making it more susceptible to wrinkles.
- This can accelerate breast sagging as the ligaments stretch without support over time.
